

how to add a checkbox in word
When you create forms or a survey with Microsoft Word, there are two ways you can get people to interact with it.
You can either print it and give it to them to read and fill in or you can ask them to read and answer it online.
In both cases, checkboxes are a great help to get feedback from your audience.
When used with a printout, your audience has the option of filling in the checkboxes with a pen or a pencil to add a cross or a tick mark to signify their disagreement or consent.
This type of checkbox is a visual symbol only, non-interactive and non-clickable, useful only when printed.
When online, you can present them with a digital document with functional or clickable checkboxes pre-filled with either a cross or a tick mark, and your audience has to click on the checkbox to toggle its contents to match their answer.
Microsoft Word allows you to insert both types of checkboxes in your document, and we will show you the two methods for inserting.
However, your document may have a long list making it tedious to insert checkboxes individually.
You may want to have a bulleted list with checkboxes acting as the bullets. However, Word allows you to have a bulleted list with only non-interactive checkboxes, but not with interactive checkboxes. Therefore, we will show you how to insert:
- A single non-interactive checkbox
- A bulleted list of non-interactive checkboxes
- Interactive checkbox
Let's start.
Method #1: Insert a Single Non-Interactive Checkbox
Step #1: Open your Word Document
Open the Word document that contains the form or survey to which you wish to add non-interactive checkboxes.
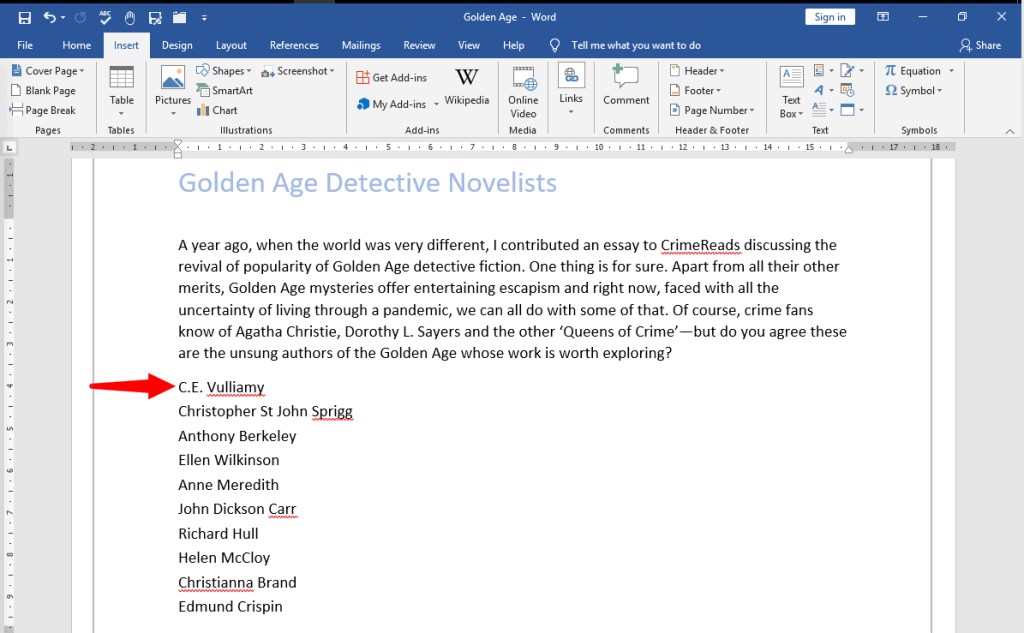
Step #2: Open Symbol Dialog
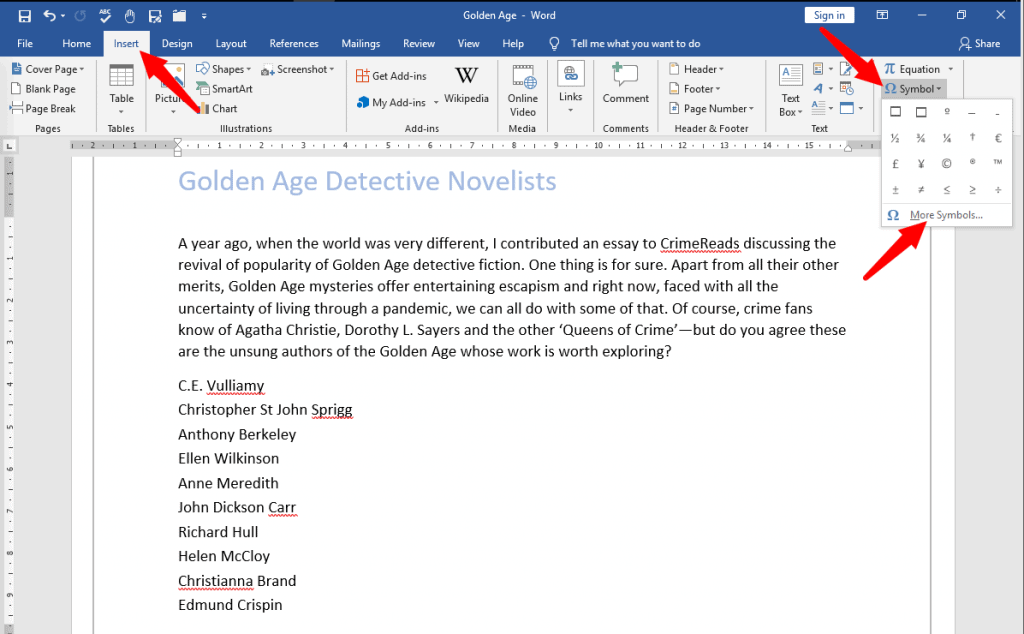
Position the cursor where you want the first checkbox to appear. Click on the Insert tab in the top menu bar to change the ribbon. Click on Symbol to open a group of symbols and then on More Symbols to open the Symbol Dialog.
Step #3: Choose the Checkbox
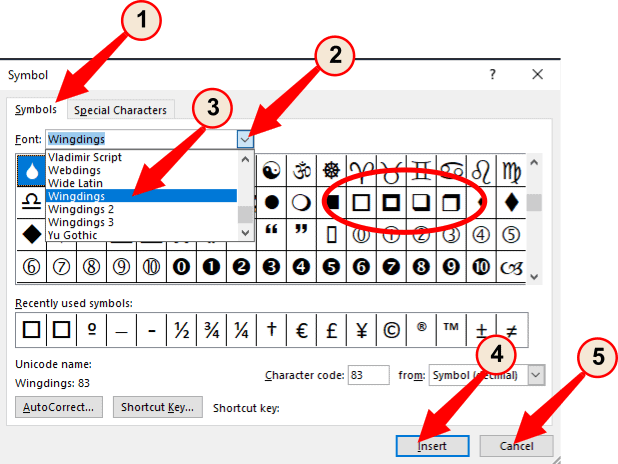
Under the Symbol [1] tab, click on the down arrow on the right side of Font[2] and select Wingdings [3]. Word will display a large number of symbols, from which you can select the type of checkbox you prefer to use in your document. Click on Insert [4] to insert the checkbox symbol into your document. Click on Close [5] to close the Symbol Dialog. From now on, your chosen checkbox appears within the group of symbols under Symbol.
Step #4: Insert another Checkbox
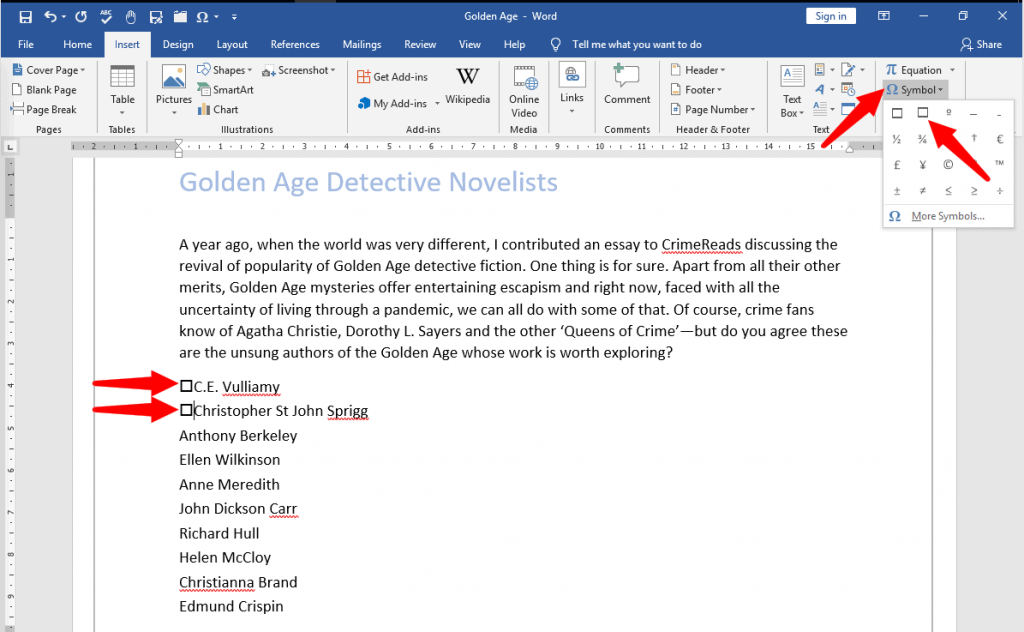
Place the cursor where you want to insert the next checkbox. Click on Symbol under Insert tab (refer Step #2), and click on the checkbox symbol from within the group of symbols on display. This is how your document will now look like.
Method #2: Insert a Bulleted List of Non-Interactive Checkbox
Step #1: Open your Word Document
Open the Word document that contains the form or survey to which you wish to add non-interactive checkboxes. Select the list.
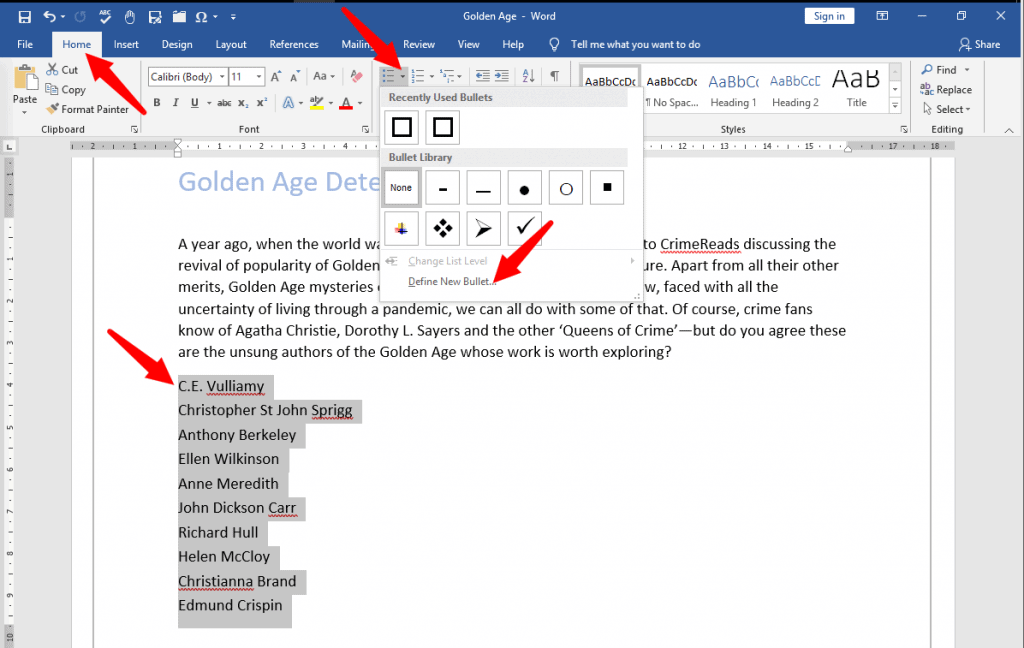
Step #2: Define a new bullet
Click on the Home tab on the top menu bar to change the ribbon. Within the section Paragraph, click on the small triangle beside Bullets to open the Bullet Library. Click on Define New Bullet at the bottom. This will open a Define New Bullet Dialog.

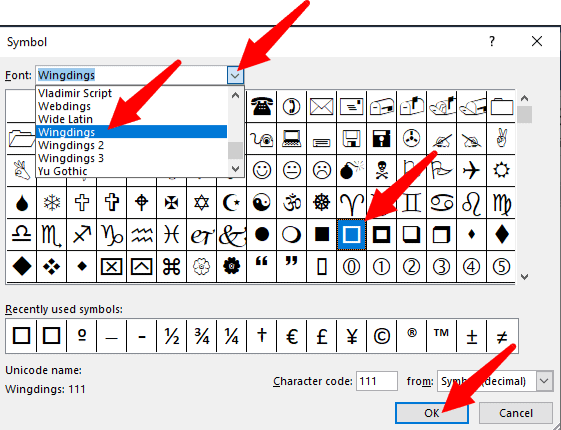
Step #3: Choose the checkbox
Click on the Symbol tab to open the Symbol dialog. Click on the down arrow on the right side of Font, and select Wingdings. Word will display a large number of symbols, from which you can select the type of checkbox you prefer to use in your document. Click on Ok, and you will return to the Define New Bullet dialog.
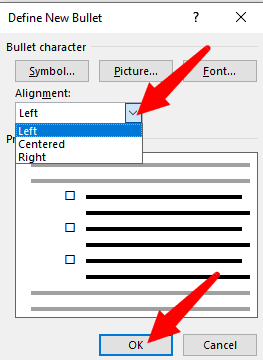
Step #4: Insert bulleted checkbox
Click on the down arrow under Alignment, and choose where you want to place the checkboxes in the gap preceding the list—on the left, centered, or on the right side. Click Ok to allow Word to place the checkboxes before the list.
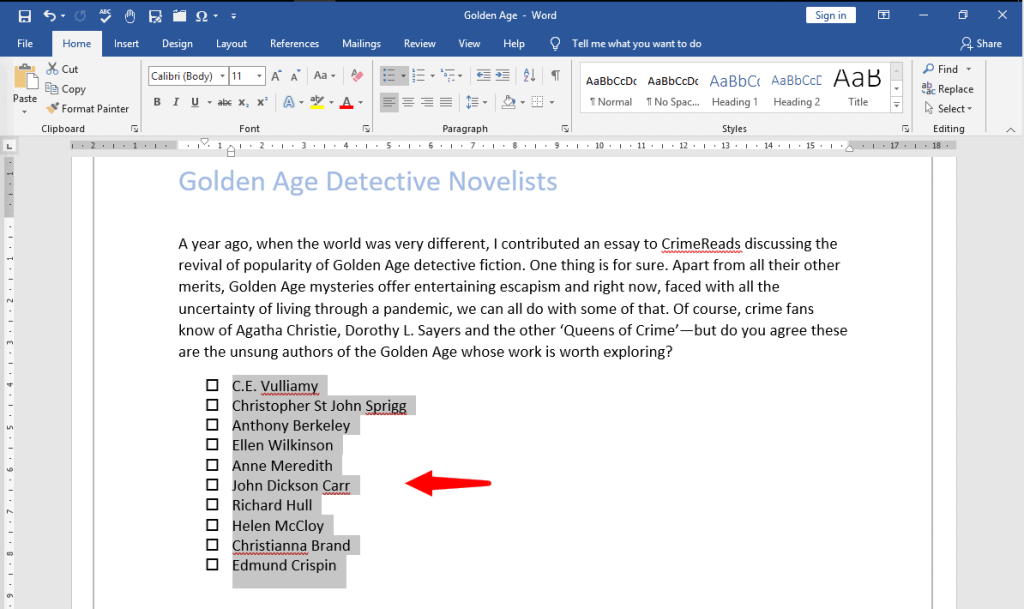
This is how your document will now look like. Word has inserted a non-interactive checkbox against all entries in the list.
Method #3: Insert Interactive checkbox
Step #1: Open your Word Document
Open the Word document that contains the form or survey to which you wish to add interactive checkboxes. Place the cursor at the location where you want the checkbox to appear.
Step #2: Enable Developer Mode
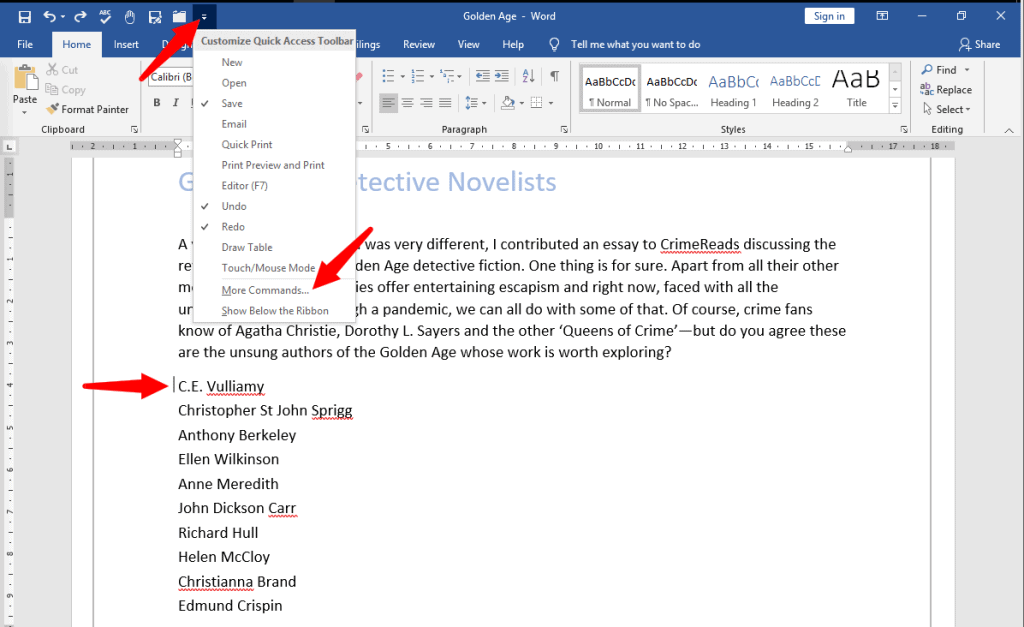
Click on the small triangle in the Quick Access Toolbar to display a drop menu to Customize Quick Access Toolbar. Click on More Commands to open the Word Options dialog.
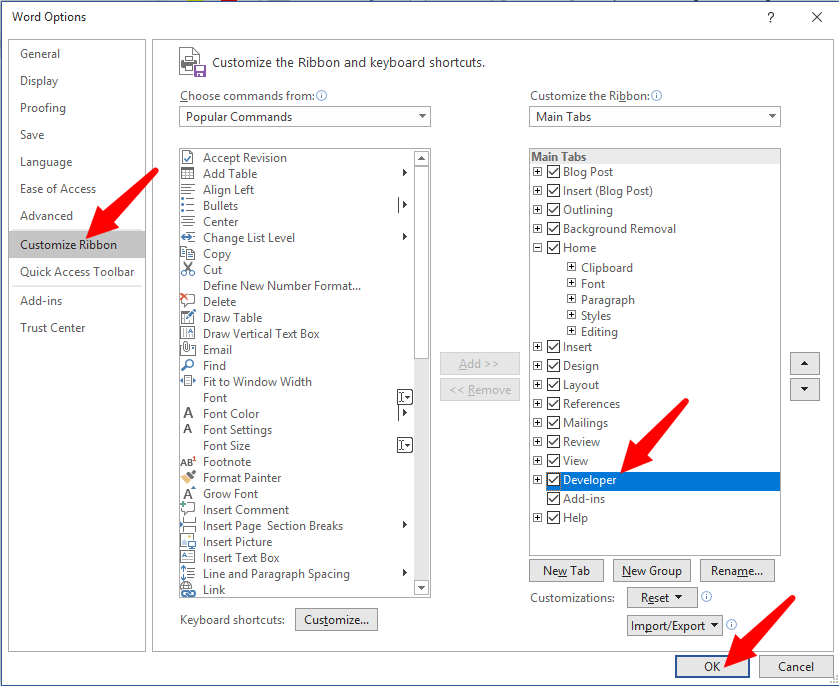
Click on Customize Ribbon. In the right column, under Customize the Ribbon, click on Developer, making sure a tick-mark appears on the checkbox immediately on the left. Click on Ok to close the dialog. Notice that Word has added a checkbox at the cursor position.

Notice that Word has also added a new tab Developer in its top menu bar.
Step #3: Insert the checkbox
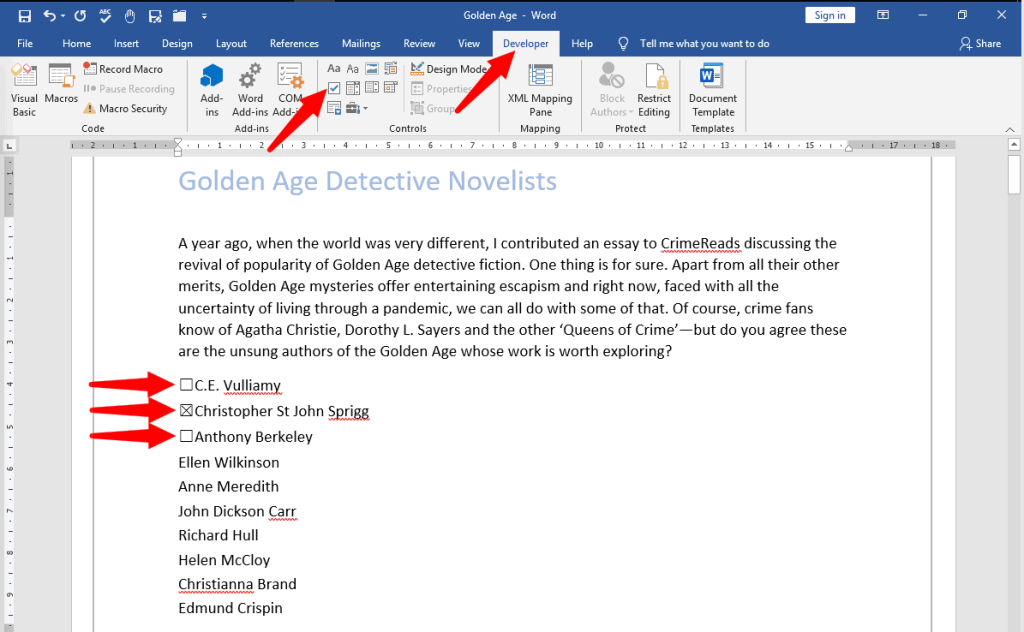
Click on the Developer tab in the top menu bar to change the ribbon. Within the Controls section, click on the Check Box Content Control. You can place additional checkboxes at positions of your choice by placing the cursor there, and clicking on Check Box Content Control for inserting each checkbox.

Finally, this is how your document may look like. If you click on any checkbox repeatedly, its contents will change from blank to a cross and back.
Step #4: Modify the checkbox content properties
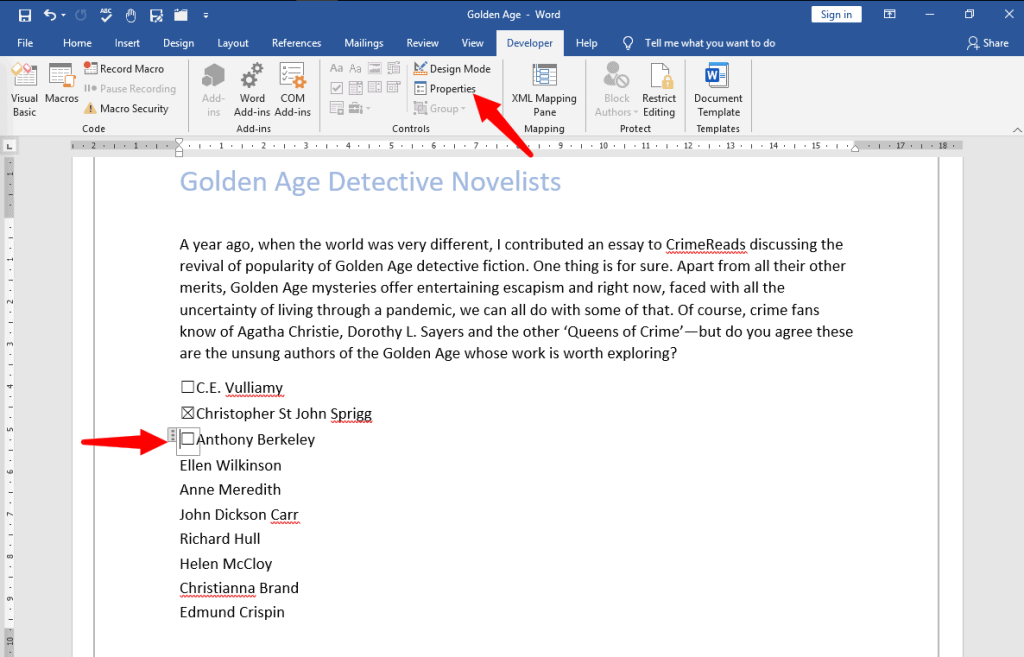
Word allows you to choose the default content of the interactive checkbox from blank, cross, and tick-mark. To modify a specific checkbox, click on it and then click on Properties within the Control section of Developer tab. This will open a Contents Control Properties dialog.
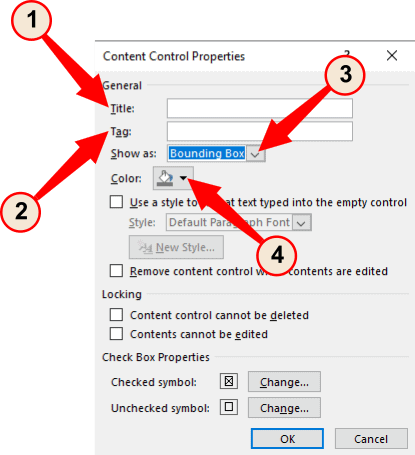
The Contents Control Properties dialog allows changing several properties of the selected checkbox. Under General, you may assign a Title [1] and a Tag [2] to the checkbox. You may also choose to Show as a Bounding Box, Start/End Tag, or as None [3]. You may also choose the color of the checkbox [4].
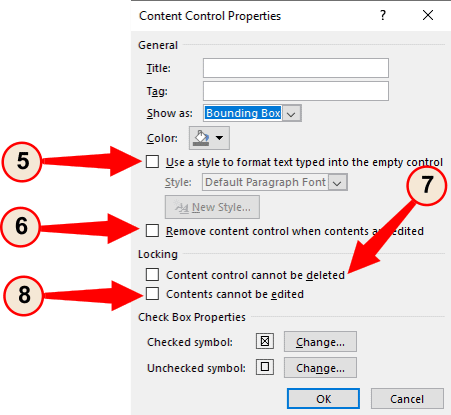
You may also choose to select your own text to appear within the checkbox [5] rather than a cross or tick-mark. You may also choose to make the checkbox contents blank when edited [6]. If necessary, under Locking, you can also choose to disallow deleting a checkbox [7] or prevent its contents from changing [8].
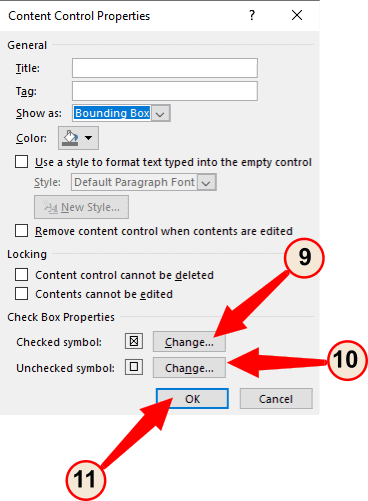
Under Check Box Properties, Word allows you to change the Checked Symbol [9] and the Unchecked Symbol [10]. Clicking on any of the Change tabs will take you to the Symbol Dialog, from where you can choose the Winding symbol of your preference (Refer Step #3 under Method #2). Click on Ok [11] to exit the dialog.
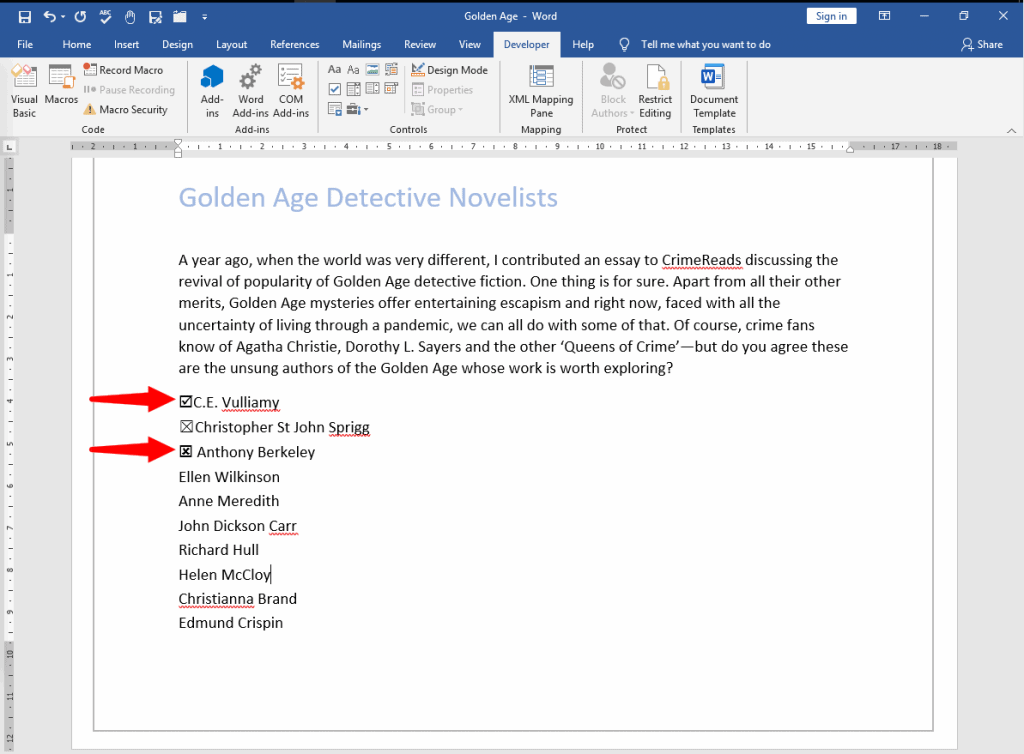
Finally, your document may look like this. Notice that items 1 and 3 have modified interactive checkboxes.
Conclusion
Obtaining feedback from your audience through forms or surveys is always easier when they have to check a few boxes, rather than express their answers. Word allows inserting checkboxes against a list of items, and allows the choice of presenting a printout or digital document to your audience for their feedback. We have shown you how to insert checkboxes in your document in a few simple steps.
how to add a checkbox in word
Source: https://officebeginner.com/msword/how-to-insert-a-checkbox-in-word/
Posted by: royfationsuld45.blogspot.com
0 Response to "how to add a checkbox in word"
Post a Comment